

Case study · Web-to-print
Web-to-Label Printing: Sell Custom Product Labels Online
Set up web-to-label printing for product labels with Cmsmart Product Designer: upload, proofing and print-ready PDFs. Get a quote today.
This guide covers setting up sticker cutline workflows in Cmsmart Product Designer so die-cut stickers print correctly. It explains how to set the bleed margin, confirm print resolution and color profile, enable the Designer Canvas, configure material and quantity options, and export bleed-ready files for a cutting machine or print vendor.
Was this tutorial helpful?
See also: Cmsmart pricing and Cmsmart products.
← WooCommerce 3D Product Preview Setup Guide · Top 6 Online T-shirt Design Software you should try in 2021 →
Written by
Cmsmart Product Designer Plugin Engineer
Builds and supports the Cmsmart Product Designer (NBDesigner) for WooCommerce.
The team behind it
 Account Manager
 Project Manager
 Business Analyst
 Developers & QA
Case study · Web-to-print
Set up web-to-label printing for product labels with Cmsmart Product Designer: upload, proofing and print-ready PDFs. Get a quote today.
Guide · Web-to-print
See a sourced WooCommerce product designer plugin comparison: pricing, features and print-ready files, then request a free migration quote today.
Guide · Web-to-print
Translate WooCommerce product designer screens with Loco Translate or Frontend Translate: see every setting, its default, and how to set it up.

Cmsmart Ecommerce provides custom ecommerce and WooCommerce development services for web-to-print, product personalization, plugin support and API integration.
Cmsmart Product Designer Plugin Engineer
Builds and supports the Cmsmart Product Designer (NBDesigner) for WooCommerce.
Meet the team →
In short
A custom sticker only looks finished once it is cut to its outline, and that outline is exactly where most sticker cutline WooCommerce stores lose time: a buyer uploads artwork sized for a square canvas, the shop has to manually add bleed and a trim guide before it reaches the cutter, and a rushed file either prints with a thin white rim or gets trimmed into the design. Cmsmart Product Designer 2.17.0 moves that bleed and trim-margin work into the product setup and the print-ready PDF step, so a die-cut sticker order leaves checkout already carrying the measurements a cutter needs.
Why do die-cut stickers cost print shops more time than they should?
Cmsmart Product Designer removes the manual bleed-and-trim step that slows down die-cut sticker production: the plugin stores a bleed margin per product and can mark a bleed line on the generated PDF, so staff are not redrawing cut guides by hand for every order.
Talk to any shop that ships die-cut stickers, labels or decals and the same five pain points come up:
Cmsmart insight: most sticker reprints we see traced back to bleed, not artwork quality — a design that looks perfect on screen gets a thin white sliver once the die-cutter's blade drifts half a millimeter. Setting the bleed/trim margin once at the product level, instead of trusting whoever exports the file that day, removes the most common cause.
The custom-sticker opportunity itself is real money: the global personalized stickers market is valued at $4.84 billion in 2025, growing toward $8.45 billion by 2035.Towards Packaging, "Personalized Stickers Market," 2025 Within that, custom die-cut stickers specifically are a smaller but fast-adopting segment — 71% of US e-commerce sellers now put custom die-cut stickers in their packaging, and 68% of small businesses use them for branding and promotion.Global Growth Insights, "Custom Die Cut Stickers Market," 2025
What does a clean sticker ordering flow look like?
In Cmsmart Product Designer, a buyer picks a die-cut sticker's material and quantity, designs or uploads artwork in the online editor, and checks out — the bleed margin and cut-ready file are handled behind the scenes, so the customer never has to think about trim lines.
Example scenario: a buyer opens a die-cut sticker product, picks the Glitter vinyl material and a quantity of 50, and the price recalculates live against the product's quantity-break table. They click Start Design, drop a logo onto the canvas, and send it to checkout. On your side, the order arrives with the artwork already mapped to the product's configured bleed margin and print specs — no email back-and-forth to confirm sizing before the job can go to production.
How does Cmsmart handle the bleed and cutline for a sticker order?
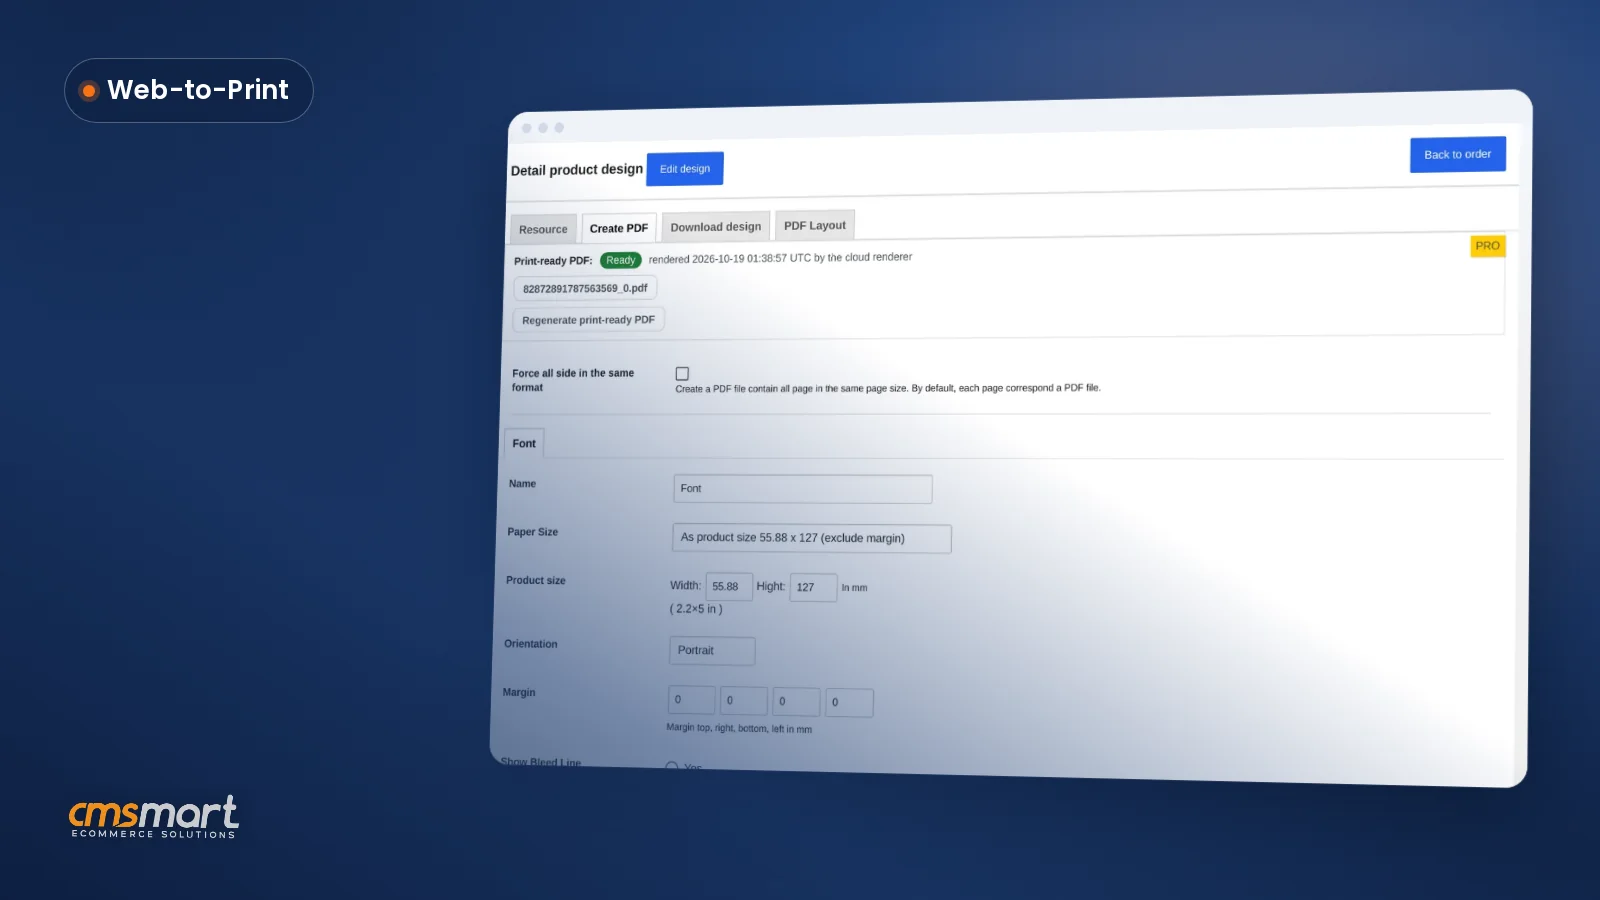
Cmsmart Product Designer 2.17.0 stores a bleed/trim margin per product, offers a "Show Bleed Line" option when the print-ready PDF is generated by Cmsmart Cloud, and exports the finished artwork as SVG, high-resolution PNG, CMYK JPG with ICC profile, or PDF — covering what a cutter or print vendor needs to produce the shape.
Three building blocks do the work, and only the first two ship in the core plugin today:
What's the business value of getting the cutline right before checkout?
A product-level bleed margin and a print-ready PDF with a bleed line cut the back-and-forth between sales and production, reduce reprints from clipped artwork, and let a shop quote faster — because the file leaving checkout is already production-ready.
Rough-cut ROI worksheet: take your sticker orders per week (O), the minutes of manual bleed/trim/export work you currently spend per order (M), and your loaded staff cost per hour (C). Weekly cost of manual file prep is approximately O × M ÷ 60 × C; that is what moving the bleed margin and export into the product and PDF settings gives back, before counting the reprints it also prevents. Plug in your own order volume, minutes-per-order and hourly rate — the formula is the same regardless of shop size.
How do you set up sticker cutline WooCommerce products in Cmsmart Product Designer?
You configure the bleed margin on the sticker product, turn on the bleed line when you generate the print-ready PDF, and export the final design as SVG or CMYK — all inside the existing Cmsmart Product Designer admin, no code required for the standard workflow.
To set up a die-cut sticker product so every order carries a correct bleed and a cutter-ready file:
For the settings not covered here — DPI defaults, allowed upload types, printing-option price matrices — see our dedicated walkthrough on configuring individual product settings in NBDesigner, and for the print-ready PDF pipeline itself, exporting a design online as a print-ready PDF.
Going further: what can Cmsmart build on top of the standard cutline workflow?
Beyond the bleed margin and print-ready PDF that ship in the core plugin, Cmsmart builds custom extensions — a live on-canvas cutline overlay, kiss-cut sticker sheets, or automated nesting for a print vendor's API — tailored to how your store and production floor actually work.
Once the standard bleed/trim and export workflow is live, a few extensions come up often with sticker and label sellers. None of these ship in the base plugin — each is custom development, scoped to your catalogue:
Cmsmart has run custom web-to-print development since 2012 as a Netbase JSC division, delivering through a discovery → solution design → sprint → QA → launch → support model (see our ecommerce project delivery process) and our product designer customization service. If a live cutline overlay or sheet-nesting workflow would save your production floor real time, Get a custom cutline-preview quote
Why work with Cmsmart on your sticker storefront?
Cmsmart has built and supported the Product Designer (NBDesigner) plugin and custom web-to-print projects since 2012, with a published Trustpilot track record and real client delivery across 80+ countries — not just a plugin changelog.
Cmsmart is a Netbase JSC division, building ecommerce and web-to-print software since 2012, with 6,300+ client projects and 4,600+ projects delivered, including 500+ custom development projects, across 80+ countries. Cmsmart is rated 4.2 on Trustpilot (404 reviews).Trustpilot, Cmsmart reviews
See real delivery work in our project case studies, browse the Cmsmart Product Designer plugin page, or explore pricing-engine options for print products on our pricing options page. For the wider web-to-print picture, start at our web-to-print solutions hub.
Frequently asked questions
What is a sticker cutline, and why does it matter for WooCommerce stores?
A cutline (or die line) marks where a sticker's shape will actually be cut, with a small bleed margin around it so the printed color reaches the edge cleanly. Get it wrong and stickers either print with a thin white rim or get trimmed into the artwork — Cmsmart Product Designer 2.17.0 handles the bleed margin and cut-ready export so that doesn't depend on manual file prep.
Does Cmsmart Product Designer show a live cutline while the customer is designing?
Not in the base plugin today. The plugin stores a bleed/trim margin per product and can mark a bleed line on the generated print-ready PDF, but a real-time, shape-accurate outline on the design canvas itself is custom development Cmsmart builds for stores that need that exact buyer-facing preview.
How do I set the bleed or trim margin for a die-cut sticker product?
Open the product, scroll to Production specs, and set the Bleed area field in millimeters — 3mm is the common print-industry default. It applies to every order of that product automatically from then on.
What file format should I send to my cutting machine or print vendor?
Use the SVG export from the order's Download design tab for the vector cut path, and the CMYK JPG (with ICC profile) or PDF for the press file. PNG is best for proofs, not production.
Can Cmsmart add a real-time cutline preview or sheet-nesting layout to my store?
Yes — both are common custom-development requests from sticker and label sellers. Cmsmart scopes these through a discovery and solution-design phase before development starts, so the preview matches your actual die shapes and production workflow.
Does the bleed line setting change my existing print-ready PDFs?
No. "Show Bleed Line" only affects PDFs generated after you turn it on, and changing paper size, margins or bleed lines creates a custom layout alongside the default print-ready file rather than overwriting it.
What print resolution and color profile should a die-cut sticker file use?
The setup guide recommends confirming a print resolution of 300 DPI together with a CMYK color profile before generating the final file, since these settings keep colors accurate and details sharp once the sticker is printed and cut.
How do I turn on the Designer Canvas for sticker products?
Enable the Designer Canvas option inside the Online Designer settings for the product, which lets the sticker's artwork and cutline display correctly on the product page before a customer places their order.
What material and quantity options can I set for a sticker product?
The printing options for a sticker product can include different materials along with quantity breaks, so pricing and production settings adjust automatically depending on the material a customer picks and how many stickers they order.
Where are the other PRINTMART | Magento Web To Print Integrated Online Design Package tutorials?
Every PRINTMART | Magento Web To Print Integrated Online Design Package tutorial is listed on the PRINTMART | Magento Web To Print Integrated Online Design Package tutorials page. Customers with a licence can open a support ticket from the Cmsmart dashboard when a step does not match their install.
What if a step in this PRINTMART | Magento Web To Print Integrated Online Design Package tutorial does not match my store?
This tutorial describes the release that was current when it was written (it was published on 15 March 2021), so a menu or setting may have moved since. Customers with a licence open a support ticket from the Cmsmart dashboard, naming the step and adding a screenshot, and the team answers there.
How do I pay securely?
Contracts and payments go to the company, Netbase JSC: plans are paid through PayPal; services are invoiced by Netbase JSC under a written proposal and paid by bank transfer to Netbase JSC's company account or by PayPal Business. Cmsmart (Cmsmart Ecommerce) is the ecommerce brand of Netbase JSC, a company based in Hanoi, Vietnam.
How do I contact Cmsmart or get a quote?
Message the Cmsmart team on WhatsApp at +84 937 869 689 or email project@cmsmart.net; the contact page at cmsmart.net/contact lists every channel, and Request a quote (cmsmart.net/project-proposal) sends a project brief. Customers with a licence open a ticket from the dashboard.
Further reading