That's what one of our clients, Jessica, told us. She was running a small mug store on WooCommerce—sales were okay, but stuck.
Until she discovered personalization.
Until she discovered Cmsmart.
Fast-forward 30 days:
- ✅ Her store was redesigned with AI product options
- ✅ Customers could design their own mugs with 3D preview
- ✅ AOV jumped by 42% — and she finally felt in control
Want to learn how she did it (and how you can too)?
🎓 Join our FREE 30-Day Email Course:
"Personalize, Launch & Scale – The Smart Ecommerce Way"
You'll get:
- ✔ 1 lesson a day, straight to your inbox
- ✔ Real store examples, demos & playbooks
- ✔ No tech jargon. Just strategy that works.


Hi Guys,
I will guide you through the basic installation of Theme Installation and Plugin Installation.
Theme Installation
Before beginning the installation and configuring of your new theme, you must first have WordPress with the latest version already installed on a server.
The installation steps include in:
Step 1: Download our package from ThemeForest
Step 2: Unzip our package there will as image below:
Step 3: Theme Installation
Go to Appearance -> Themes -> Add New -> Upload Theme. Then, click “Browse” button to select theme package and click on Install Now
Note: You can upload 2 left themes as above.
Plugin Installation
After you have installed and activated the theme, plus saved the theme options. There’ll be a message of required plugins at the top of the WordPress dashboard. Just click the link to Activate.
Next, click the link to Begin installing plugins
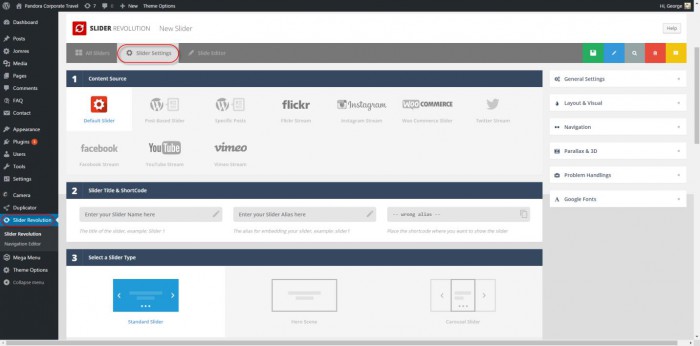
Now, Install the required plugins as demonstrated in the screenshot below:
Next, click the link to Return to Required Plugins Installer
Select the plugins you had installed, and then apply the bulk action to activate theme as the image below:
Finally, you will get a confirmation notice that your plugins were activated.
Notes: You have to activate all plugins. You can see the inactive tab to continue installing the remaining plugins.