That's what one of our clients, Jessica, told us. She was running a small mug store on WooCommerce—sales were okay, but stuck.
Until she discovered personalization.
Until she discovered Cmsmart.
Fast-forward 30 days:
- ✅ Her store was redesigned with AI product options
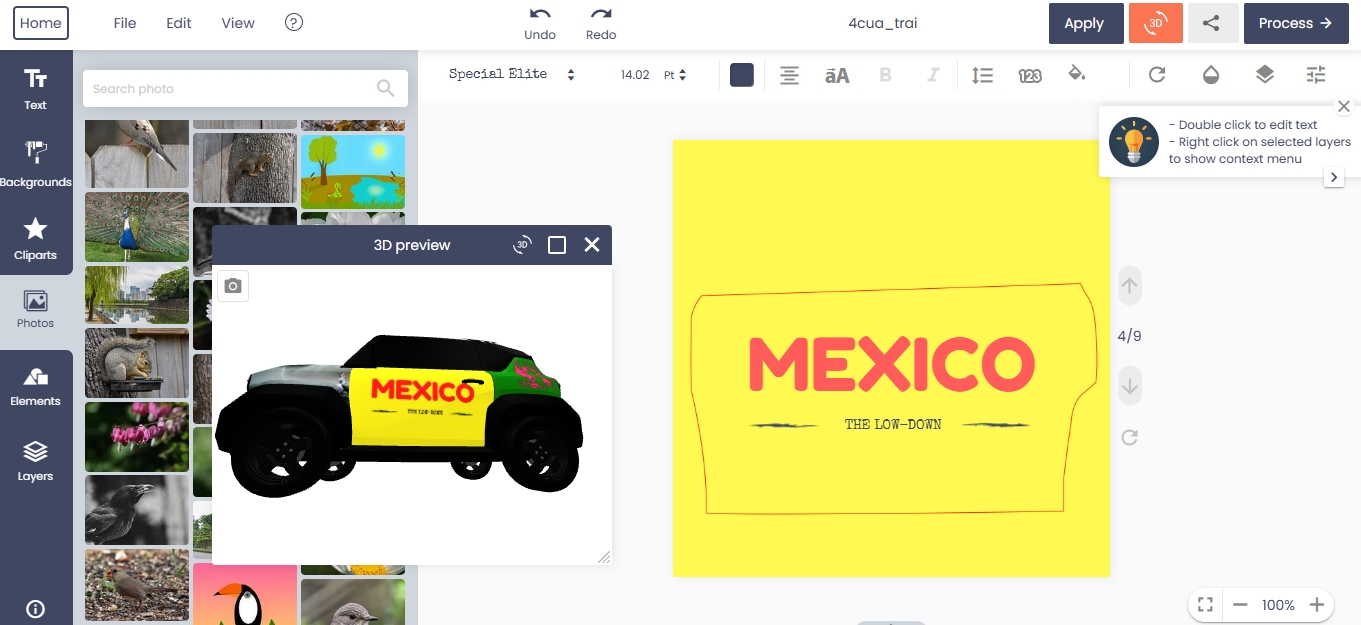
- ✅ Customers could design their own mugs with 3D preview
- ✅ AOV jumped by 42% — and she finally felt in control
Want to learn how she did it (and how you can too)?
🎓 Join our FREE 30-Day Email Course:
"Personalize, Launch & Scale – The Smart Ecommerce Way"
You'll get:
- ✔ 1 lesson a day, straight to your inbox
- ✔ Real store examples, demos & playbooks
- ✔ No tech jargon. Just strategy that works.


In today’s competitive eCommerce landscape, personalization has become more than a trend—it’s an expectation. For Web2Print businesses offering customizable products like apparel, mugs, business cards, and promotional gifts, allowing customers to design their products directly on your website is a game-changer.
This long-form tutorial walks you through configuring product-specific online design settings using the WooCommerce Online Product Designer Plugin by Cmsmart. This plugin transforms your WooCommerce store into an interactive, design-enabled platform tailored for both B2C and B2B customers.
Whether you’re new to Web2Print or upgrading from a basic system, this guide will show you how to provide a seamless, professional design experience for your customers—one that improves conversions, reduces errors, and enhances customer satisfaction.
Why Product-Specific Design Matters for Print Commerce
Every product has unique design needs. A business card differs from a t-shirt; a mug requires different bleed margins than a banner. By configuring your online designer tool per product, you:
Offer a focused, intuitive experience tailored to the product’s shape and use case.
Eliminate confusion by hiding unnecessary tools or zones.
Create print-ready files that match your production specs, reducing back-and-forth corrections.
Guide customers through the personalization process, boosting confidence and order success.
This isn’t just a technical tweak—it’s a strategy for scaling your store with quality and consistency.
Step-by-Step: How to Configure Design for Each Product
Let’s walk through the key configuration steps within your WordPress + WooCommerce backend using NBDesigner (Cmsmart Product Designer).
Step 1: Enable Online Design Per Product
To begin, go to
Products > Editin your WordPress dashboard and scroll to the NBDesigner Options section. Enable the following:Enable Design – activates the editor for this product
Enable Upload Design – lets users upload artwork
Enable Upload Without Design – provides flexibility for offline workflows
This flexibility supports various customer types—from DIY users designing from scratch to agencies uploading client-approved artwork.
Step 2: Configure Canvas & Printable Areas
In the Custom Design tab:
Add Sides: Define all applicable printable surfaces—Front, Back, Sleeve, etc.
Set Canvas Size: Enter dimensions in inches or cm (e.g., 20x30 cm for a T-shirt)
Set Design Area: Determine the customer-editable area within the canvas
Safe Zone & Bleed: Enable visual guides to prevent printing issues
Step 3: Set Background and Overlay
To enhance clarity and design accuracy:
Upload a background image for the blank product template
Define a solid background color or make it transparent
Use overlays (e.g., stitching, label placement) to show visual constraints
These assets help customers visualize the end product and avoid layout mistakes.
Must-Have Features to Maximize Personalization
Cmsmart has evolved the NBDesigner plugin with powerful features that benefit both store owners and customers.
Display & Layout Features
Option Grouping: Simplify the UI by grouping fields by category
Step-by-Step Layout: Guide users through the personalization workflow in logical steps
These features are especially helpful for mobile UX and first-time users.
Print Pricing Engine
Delivery Date Selection with Price Matrix: Charge based on urgency
Artwork Notes: Let customers enter special printing or file-handling instructions
This dynamic pricing approach increases revenue while managing expectations.
Design Guidance & Tools
Design Guidelines: Upload visual instruction layers (e.g., safety margins)
QR & vCard Generator: Ideal for business card or promo product personalization
Smart Template Enhancements
Template Mapping: Autofill templates using customer profile data
Advanced Quote Requests: Allow users to request bulk/custom quotes
Template Filter: Customers can search templates by tag, color, or category
These tools speed up ordering and enable scalable template-based selling.
Video Guide: Configure Design Per Product
For a visual walkthrough, watch this detailed video guide on our official YouTube channel:
Try the Demo + Claim Your 18% Discount
Get hands-on experience with the live editor:
Explore Our Live Demo Store
Use Coupon Code MAR_DL at checkout to receive 18% OFF
This is the fastest way to validate how the plugin fits your business.
Need Help? We’ve Got Your Back
Cmsmart provides full onboarding, training, and project consulting. Whether you’re configuring your first customizable product or building a full Web2Print marketplace, we can help.
Submit a support ticket via the Cmsmart Support Portal, or schedule a 1-on-1 call to discuss custom development or integration.
Want to learn how ecommerce personalization improves conversions? Check out this guide to ecommerce personalization strategies.
Take the Next Step in Personalization Commerce
Cmsmart has helped over 50,000 businesses scale their print and personalized product offerings. With a robust platform and expert team behind you, there’s no limit to what you can offer your customers.
Continue exploring real-world case studies, plugin tutorials, and store setup guides at the Cmsmart Ecommerce Community.
Ready to turn your store into a design-powered sales engine? Let’s make it happen.
Sincerely,
The Cmsmart Ecommerce Team
Your trusted partner in Web2Print and product customization technology.