That's what one of our clients, Jessica, told us. She was running a small mug store on WooCommerce—sales were okay, but stuck.
Until she discovered personalization.
Until she discovered Cmsmart.
Fast-forward 30 days:
- ✅ Her store was redesigned with AI product options
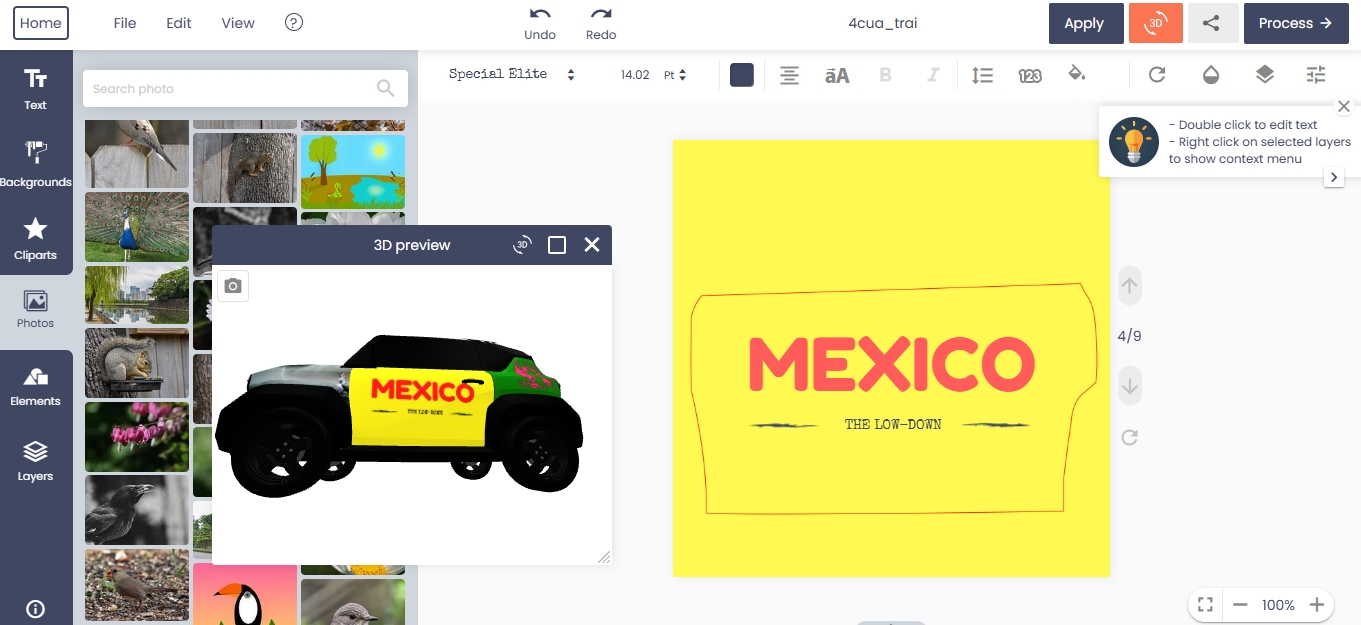
- ✅ Customers could design their own mugs with 3D preview
- ✅ AOV jumped by 42% — and she finally felt in control
Want to learn how she did it (and how you can too)?
🎓 Join our FREE 30-Day Email Course:
"Personalize, Launch & Scale – The Smart Ecommerce Way"
You'll get:
- ✔ 1 lesson a day, straight to your inbox
- ✔ Real store examples, demos & playbooks
- ✔ No tech jargon. Just strategy that works.


As you know, before deciding to buy a product, especially intellectual products such as software, we must always learn about how to use that product. However, with increasing demand, increasingly diverse customers, having a simple product easy to use and has many features that can be used immediately is extremely difficult. Therefore, before you buy products at CMSmart, we always try and provide the most detailed documentation, video guide for our customers, so that you can use the product simply and the easiest.
WordPress Online Design, as one of our the most outstanding products. The end-user will easily implement the design version she/he likes with our useful and easy-to-use feature. Besides, we also provide many tools to help the user get the quick steps to achieve the wanted features. Therefore, below are some detailed guidelines on using WordPress online design products that we would like to introduce to you. Here we go!
Design product with Woocommerce product designer plugin.
1. How to create a template?
2. Insert and edit text on the template
Then, you can change the text color with document colors
Next, your customers can change the text font type they want.
3. Insert and edit clipart.
There are many interesting clip arts in WordPress online design that you can choose to insert for your design.
Step 1: Click the clipart menu and search: Enter the name of clipart to search.
Step 2: Click or drag&drop to add clipart.
Then, do you want to change color of clipart? Click your clipart on design, choose one color you like in document color.
4. Insert and edit the image.
How to insert a photo?
Step 1: Move to Photos menu
Step 2: Upload image
5. Insert and edit the element.
Shape
Step 1, you move to the Element menu Custom Design Shapes. Then, you click or drag&drop to add shapes
Step 2, you can change the color of shape with document colors
Icons
Move to the Element menu and click "Icon" Button to insert Icon for your design. There are many Icons in the Icon library that you can choose.
Customize drawing with Draw Feature
6. Check the design
How can your customers check their designs in WordPress Online Design tool?
First: Go to your count -> view order
Click on the order number to view detail.
Above is my introduction about "How to use Wordpress Online Design plugin in Frontend". I hope that this post, in my opinion, brought you some useful information. If you have any questions, please contact the Support Team or information below. If you want to know more about NB WordPress Design, you can try this product by access Live Demo or nbdesigner.cmsmart.net.
Do you want to receive coupon code from our promotion program? Please access promotion programs. Thank you for reading and keep following us to get more information in the next article! Bye, See you again!
Vincent
Sales Consultant Manager
Skype: live:vincent_4281
Phone/ WhatsApp: +84 937 869 689
Email: [email protected]