That's what one of our clients, Jessica, told us. She was running a small mug store on WooCommerce—sales were okay, but stuck.
Until she discovered personalization.
Until she discovered Cmsmart.
Fast-forward 30 days:
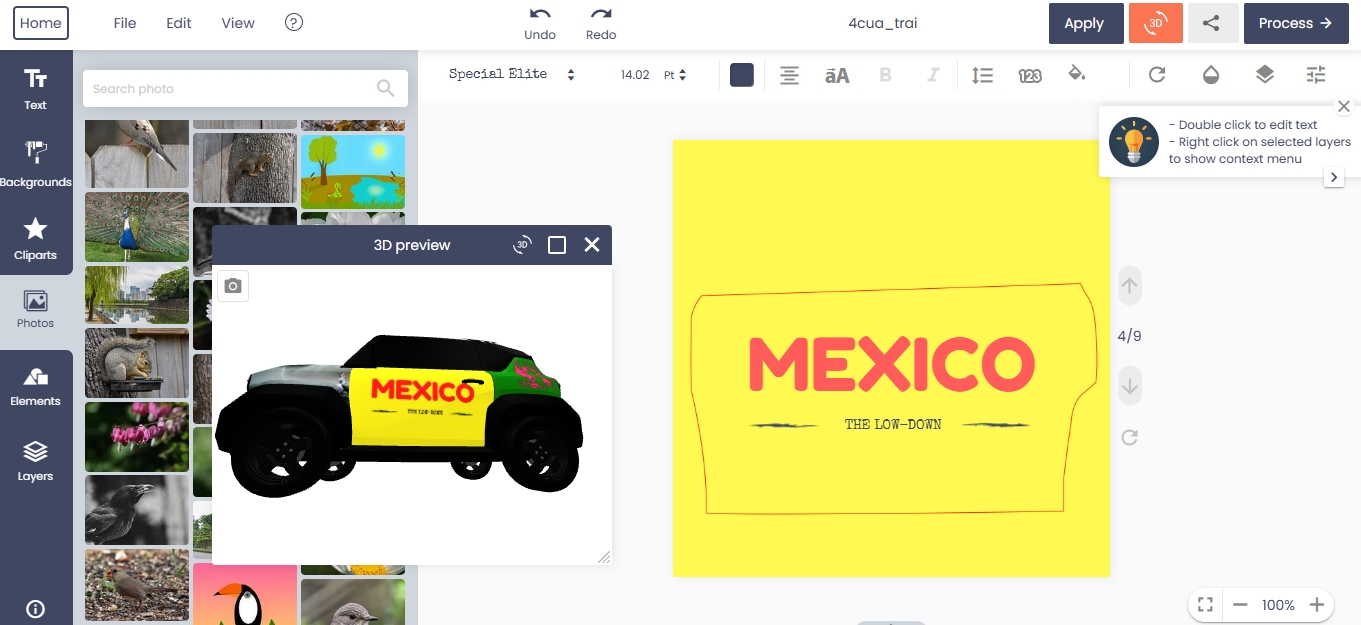
- ✅ Her store was redesigned with AI product options
- ✅ Customers could design their own mugs with 3D preview
- ✅ AOV jumped by 42% — and she finally felt in control
Want to learn how she did it (and how you can too)?
🎓 Join our FREE 30-Day Email Course:
"Personalize, Launch & Scale – The Smart Ecommerce Way"
You'll get:
- ✔ 1 lesson a day, straight to your inbox
- ✔ Real store examples, demos & playbooks
- ✔ No tech jargon. Just strategy that works.


Who Should Use This Guide (ICP Overview)
Understanding and applying Area Design Shape configuration is critical for several segments in the print and ecommerce industry. Whether you're a solo entrepreneur or part of a scaling print enterprise, precise editable area control boosts conversion, protects output quality, and reduces refund rates.
Ideal Customer Profiles (ICPs)
This guide targets the following business types that rely on customizable product workflows:
1. Print-on-Demand (POD) Entrepreneurs
Selling t-shirts, mugs, tote bags, or phone cases online
Need to control where customers add logos, slogans, or artwork
Require efficient, print-ready output with minimal manual adjustments
Industry Insight:
The global POD industry is projected to grow at a CAGR of 26.1% from 2022 to 2030 (source: Grand View Research). Startups can scale quickly when tools like NBDesigner eliminate backend errors through shape-based editable zones.
2. Marketing and Promotional Product Agencies
Offer branded items like notebooks, shirts, banners, and water bottles
Handle B2B bulk orders with strict logo placement and bleed zone requirements
Need to enforce design boundaries without confusing end-users
Business Tip:
3. Sign and Label Manufacturers
Create printed assets for windows, vehicles, packaging, etc.
Often deal with non-standard shapes (e.g., circle, oval, die-cut)
Must match physical templates with digital mockups
Statistic:
The global signage market is expected to surpass $63 billion by 2030 (source: Research and Markets), driven by demand for custom label and sticker applications.
4. B2B Print Portals
Enable enterprise clients to reorder branded materials online
Need to automate file checking and minimize manual graphic reviews
Often include locked design zones for compliance
5. WooCommerce Web Agencies & Developers
Build customizable product stores for clients in print, gift, and fashion niches
Seek reliable plugins that allow control over design boundaries
Frequently request editable canvas areas tied to product variation logic
Related Solution:
Use Cmsmart’s WooCommerce Product Designer Plugin to give each WooCommerce product a tailor-fit editable design area.
What Is Area Design Shape and Why It Matters
The Area Design Shape defines the exact zone on a product where a customer can insert and manipulate design elements such as text, logos, clipart, or uploaded images. It's a critical feature of any professional online product designer plugin used in Web-to-Print workflows.
Why You Must Configure It
Failing to define a specific editable area can result in:
Designs that extend beyond printable zones
Cropped logos or unreadable text
Increased refund and support requests
Longer manual editing time before print approval
By contrast, a well-configured area design shape:
Aligns perfectly with your print specs
Enhances the design interface with guides and safety zones
Enables auto-export of print-ready files with accuracy
Supports dynamic shape types: rectangles, ellipses, and custom SVG-based boundaries
SEO Tip: Learn more about how this configuration integrates with Cmsmart’s full suite of Web2Print ecommerce solutions.
Benefits for Store Owners and Customers
For Store Owners:
Reduces time spent reviewing, correcting, and emailing back designs
Ensures production quality consistency across products
Automates the approval process with safe zone validation
For Customers:
Clear design boundaries reduce errors and confusion
Real-time feedback (like low-res or out-of-bounds alerts)
Professional previews boost purchase confidence
Case Insight:
Examples of Area Design Shapes in Use
T-shirt store: Front chest area with curved top margin
Business card: Rectangle with 3mm bleed and safe zone
Sticker sheet: Multiple circular editable zones using SVG mapping
Custom packaging: Folded box template with masked printable panels
Link for deeper setup tutorial:
See how to configure custom dimensions and design areas for product personalization in WooCommerce.
Step-by-Step Guide to Configure Area Design Shape
Setting up the Area Design Shape in your WooCommerce store using Cmsmart NBDesigner is straightforward but requires precision. Whether you're configuring products for t-shirts, business cards, or custom stickers, following these steps ensures customers design only within the printable space—saving you from costly production errors.
Step 1: Enable NBDesigner Features on the Product
Go to your WordPress admin panel.
Navigate to Products > Edit your chosen product.
Scroll to the NBDesigner Settings panel.
Enable the following checkboxes:
Enable Design
Enable Upload Design
Enable Upload Without Design
Step 2: Define the Editable Sides of the Product
Under the Custom Design tab, click Add More to create sides such as:
Front
Back
Left Sleeve
Spine (for books or boxes)
Each side includes its own canvas with configuration fields:
a. Product Size (Wₚ x Hₚ)
This defines the physical size of the product (e.g., 210 x 297 mm for an A4 document).
b. Design Area (Wₐ x Hₐ)
Set the customizable portion where customers can place designs.
Ensure this stays within safe margins to avoid trimming issues.
c. Offsets (Tₐ, Lₐ)
Set the top and left padding from the canvas border.
This determines where the editable area begins on the product image.
Example:
Step 3: Activate Safety Guides
Enable visual guides:
Show Cut Line
Show Safe Zone
Show Bleed Area
These indicators help both customers and production teams by visually identifying:
Where artwork should not extend beyond (cut line)
Where essential elements should be kept inside (safe zone)
Extra edge areas for trimming tolerance (bleed)
Learn more: How to Configure Custom Dimensions and Display Zones
Step 4: Optional – Add Backgrounds or Overlays
You can upload a background image (like a shirt mockup or product photo).
Enable “Include in Output” if you want this image to appear in the exported design file.
Optional: add an overlay layer to simulate texture, grid, or print template.
Case Tip:
Step 5: Save & Preview
Save your settings and view the product in the frontend design editor.
Ensure that the Area Design Shape aligns with product photos and that the editable region behaves correctly across devices.
SEO Tip:
See NBDesigner’s Live Demo to interact with real-time Area Design Shape configurations and test different layout views.
How It Appears on the Frontend (Editor Layout Modes)
Once the Area Design Shape is configured, it's crucial to understand how it will appear in the customer-facing interface. NBDesigner offers multiple layout views that not only affect user interaction but also directly influence the design accuracy and final output quality.
Supported Layout Modes in NBDesigner
Modern Layout (Recommended)
Fully responsive and optimized for all screen sizes.
Displays real-time warnings for:
Designs outside the safe zone
Low-resolution images
Includes essential visual tools such as:
Rulers
Grids
Product dimension indicators
Zoom controls
Compatible with modern UX practices and mobile interfaces.
Use Case:
Classic Layout
A simpler, legacy interface with fewer visual aids.
Suitable for older devices or lightweight setups.
Lacks advanced warning and guide features.
Best for non-complex products such as greeting cards or flyers.
Visual Layout
Focuses on presenting the product in a larger, visual-first format.
Ideal for products like apparel, canvas, or large prints where a visual mockup drives the sale.
Can be enhanced with background images or overlays for realism.
Pro Tip:
How the Area Design Shape Is Displayed
Once your layout mode is applied, the configured design area will display as a bounding box:
Customers will only be able to design within this box.
Attempting to place content outside triggers alerts (Modern layout).
Safety lines (cut line, safe zone, bleed) appear if enabled.
This helps prevent printing issues and guides users toward successful design outcomes.
Business Tip:
Supporting Features That Enhance the Design Zone
Safe Zone Display: Warns when elements are too close to the trim edge.
Gridlines and Rulers: Help align content for symmetry and professionalism.
Zoom and Scroll: Allow users to inspect edge placement and small text.
Snap-to-Grid: Prevents accidental misalignment.
Related Tutorials and Tools
NBDesigner Visual Layout Setup Guide
Frontend Preview Examples on Live Demo
Cmsmart Product Designer Plugin
Real-Life Use Cases by ICP
Proper configuration of Area Design Shape enables different industries to achieve professional results, improve operational efficiency, and boost customer confidence. Below are specific use cases by business type, demonstrating how this feature solves real challenges in print ecommerce.
1. T-Shirt Print-on-Demand Stores
Scenario:
Allow customers to personalize various garment areas—front, back, sleeves—with specific print boundaries and DPI settings.
Configuration:
Use rectangular design areas.
Set dimensions (e.g., 30cm × 40cm for front print).
Enable safe zone and bleed guides.
Apply the Modern Layout for mobile-friendly editing.
Result:
2. Business Card & Stationery Printers
Scenario:
Users design cards with exact print specs, often requiring a margin-based design zone with trimming tolerance.
Configuration:
Enable cut lines, bleed zones, and a strict safe area.
Fix DPI to 300 for sharp typography.
Use Classic Layout or Modern Layout depending on the audience.
Tip:
3. Sticker, Label & Decal Providers
Scenario:
Offer circular, oval, or custom die-cut stickers where the editable area must match the cut path.
Configuration:
Use Custom Shape Area (SVG-based).
Upload a shape template (e.g., circle or oval).
Lock aspect ratio to prevent stretch.
Enable warnings for out-of-bounds designs.
Statistic:
According to Research and Markets, the global sticker and label market will surpass $65 billion by 2032, driven by eCommerce and personalized packaging demand.
Use Case:
4. Personalized Gift and Merchandise Shops
Scenario:
Customers create custom mugs, keychains, or photo gifts with artwork fitting very specific panels or zones.
Configuration:
Design area aligned to product curvature.
Use image overlay for realistic mockup.
Enable zoom, snap-to-grid, and resolution warning.
Business Tip:
5. Large B2B Print Portals
Scenario:
Enterprises re-order branded assets across departments—business cards, letterheads, presentation folders—with strict guidelines.
Configuration:
Lock template layers.
Assign design area per product size.
Disable design editing outside allowed zones.
Use Case:
Related Tools and Layout Features in NBDesigner
To maximize the impact of your Area Design Shape configuration, it’s essential to leverage other supporting tools and layout features available within the NBDesigner plugin by Cmsmart. These tools not only enhance the customization experience for your customers but also streamline the backend management for your store team.
Key Tools That Work Seamlessly with Area Design Shape
1. Visual Layout Editor
NBDesigner allows you to configure how the editor appears to users via multiple layout modes: Modern, Visual, and Classic. Each one is designed for specific product types and devices.
Use Modern layout for apparel and complex products.
Visual layout is ideal for lifestyle-focused products like home decor or posters.
Classic layout is suitable for legacy setups or performance-constrained environments.
Related Link:
How to Set Up Visual Editor Layout
2. Printing Option Integration
NBDesigner supports integration with the Printing Option Module to add dynamic pricing based on print areas, paper type, finishing, and quantity.
Create a pricing matrix based on area size (cm² or in²).
Add logic for double-sided printing, lamination, or UV coating.
Sync pricing display with design shape selections.
Related Link:
How to Create a Price Matrix Table
3. Custom Dimensions and DPI Settings
You can configure custom product dimensions, measurement units (mm, in, cm), and DPI settings (150–300+).
Ensures exported files match print specs.
Prevents blurry outputs by enforcing minimum DPI for uploads.
Ideal for B2B and professional print clients.
Related Link:
How to Configure Custom Dimensions
4. Template Fields and Background Overlay
NBDesigner allows product templates to include:
Image overlays (e.g., product photos)
Editable zones matched to templates
Predefined design layers with locked/non-editable parts
This is particularly powerful when dealing with:
Business cards with static logos
Books with fixed spine and bleed requirements
Product mockups with layered background textures
Related Link:
Template Field Mapping Guide
FAQs About Area Design Configuration
This section addresses common questions about setting up and managing Area Design Shapes in NBDesigner. These answers help eliminate confusion, reduce support requests, and clarify what’s possible for both technical teams and store owners.
Q1: What happens if I don’t set the design area?
If you skip defining the Area Design Shape, the entire product canvas becomes editable. This often results in designs being placed too close to the edge, getting cut off in print, or misaligning with template expectations.
Q2: Can I create irregular shapes (circle, ellipse, custom paths)?
Yes. With the Custom Shape feature in NBDesigner, you can upload SVG files to define editable zones that are not rectangular.
Ideal for stickers, bottle labels, coasters, buttons
Ensures print lines match customer intent
Enhances realism in product previews
SEO Tip:
Explore how the NBDesigner Shape Tool supports product diversity across apparel, stationery, and packaging.
Q3: Can I reuse one design shape across multiple products?
Only if the physical dimensions and editable zones are identical. Otherwise, you should define each product’s Area Design Shape independently to prevent print issues.
Use templates for similar-size products.
Apply consistent margins, bleed, and safety zones.
Save time by duplicating layout profiles where applicable.
Q4: Can customers see the safe zone and get real-time warnings?
Yes. If you enable the Modern Layout and turn on visual guides, customers will:
See live feedback when elements move outside the safe zone
Get alerts for low-resolution images
Have a better understanding of where it’s safe to design
Q5: How does configuring the design shape help with production?
It reduces file rejections, enables direct-to-print workflow, and improves quality control:
Print files are ready without resizing or cropping.
Admins spend less time manually reviewing submissions.
Customers get exactly what they see on screen.
Explore More:
See how our NBDesigner frontend editor ensures WYSIWYG (What You See Is What You Get) accuracy for both consumers and production staff.
Video Tutorial: Watch the Setup in Action
Sometimes the fastest way to understand a configuration is to watch it unfold step-by-step. This video tutorial will walk you through how to configure the Area Design Shape in the NBDesigner plugin for WooCommerce. You’ll see how to:
Define design zones on products like business cards, t-shirts, and stickers
Set product size, editable area, bleed lines, and safe zones
Preview the impact in real-time inside the NBDesigner frontend editor
Troubleshoot common layout mismatches
Watch Now
How to Configure Area Design Shape and Where It Displays
Business Tip:
“Our design team watches this video every time we onboard a new store manager. It’s the most effective way to ensure consistent design setup across our 100+ SKU catalog.”
— Ecommerce Director, MyPrintLab
Why Video Matters for Training and Scaling
According to Wyzowl’s 2023 Video Marketing Report, 96% of users prefer watching a short video to learn about a product or tool, compared to reading text. For Web-to-Print platforms like yours, video tutorials are essential for:
Speeding up team onboarding
Reducing setup errors by new staff
Helping clients visualize best practices for DIY personalization
Closing support tickets faster with self-help links
Related Resource Pages
NBDesigner Plugin Overview
Setup Visual Layout Editor
NBDesigner Full Demo Portal
Best Practices to Reduce Print Errors and Increase Conversion
A well-configured Area Design Shape doesn’t just prevent production errors—it directly contributes to customer satisfaction, operational efficiency, and higher conversion rates. Below are proven best practices to implement for every product using NBDesigner.
1. Always Define Bleed and Safe Zones
Set 3mm bleed around all edges for most print items (standard in commercial printing).
Define a safe zone margin of at least 5mm inside the cut line to avoid trimming critical content.
Use Case:
2. Enable Resolution Warnings and DPI Settings
Set export DPI to 300 for sharp print output.
Activate low-resolution image alerts so users know when files may look blurry.
Statistic:
According to Smashing Magazine, over 67% of print refund issues in ecommerce are related to pixelated images or design misalignment.
3. Use the Modern Layout for Real-Time Feedback
The Modern layout provides:
Grid view for design alignment
Out-of-bounds alerts
Ruler and zoom tools
Disable the Classic layout unless absolutely necessary for legacy products.
Related Guide:
How to Setup Visual Layout Editor
4. Preview the Editor on Multiple Devices
Test all Area Design Shape zones on:
Desktop (Chrome, Safari)
Mobile (iPhone, Android)
Tablet (iPad, Samsung Galaxy Tab)
Make adjustments for usability, especially where zoom and placement controls vary.
5. Guide Customers With Design Instructions
Add instructions below the product using the Product Tabs feature.
Include notes like:
“Keep text inside green box.”
“Images should be high-res (min. 1500px).”
“Avoid placing logos near the edges.”
6. Run Prelaunch QA for Every Product
Before publishing new products:
Place a test order
Check editor alignment
Review the exported file dimensions
Store a checklist in your internal CMS to repeat this QA for every product type: business card, sticker, apparel, signage, etc.
Call to Action: Try the Tool or Consult Our Experts
Ready to empower your customers with precise design capabilities and reduce your support workload?
Whether you're running a print-on-demand store, a corporate printing service, or building a Web2Print WooCommerce solution, the Area Design Shape feature in NBDesigner ensures clean, error-free customization and professional print results.
Get Started in Three Easy Steps
Explore the Live Demo
Interact with real-time design shape settings across t-shirts, business cards, stickers, and more:
https://nbdesigner.cmsmart.net
Choose the Right NBDesigner Plan
Whether you're a startup or a B2B print enterprise, we have tailored packages:
Compare Pricing & Features
Talk to an Expert
Need help with custom shape setup, template migration, or integration with your WooCommerce store?
Contact our team at [email protected]
Why Choose Cmsmart?
Over 50,000 clients supported since 2012
Built on WooCommerce for full ecommerce flexibility
Integrated pricing matrix, visual layout, and printing option logic
24/7 support and custom development services
Need help comparing packages or planning your migration?
Email us directly at [email protected] or visit www.cmsmart.net
Let me know when you're ready for the next section: How It Appears on the Frontend (Editor Layout Modes).