Community
100 DPI vs 300 DPI: Stop Low-Res Print Reprints

See how 100 DPI vs 300 DPI changes print quality, then set DPI rules and AI Preflight in Cmsmart Product Designer to stop reprints. Plan yours.


Cmsmart Ecommerce provides custom ecommerce and WooCommerce development services for web-to-print, product personalization, plugin support and API integration.

Cmsmart Web-to-Print Solutions Consultant
Plans online print storefronts: product setup, pricing rules, proofing and print-ready files. Meet the team behind Cmsmart.

Top
In short
The invitations arrive, the customer opens the box, and the type is fuzzy. They uploaded a 100 DPI image saved from a phone screen; nobody checked it before it went to print. Now you reprint at your own cost, refund, or argue, and the customer remembers your shop for the wrong reason.
Print quality and DPI are a business problem before they are a technical one. This guide explains 100 DPI vs 300 DPI and what each means for print quality in plain terms, then shows how the Cmsmart Product Designer (NBDesigner) on WooCommerce stops low-resolution artwork with upload rules and AI preflight before production, and what Cmsmart builds when you need stricter, product-specific checks.
What is DPI, and how does 100 DPI vs 300 DPI affect print quality?
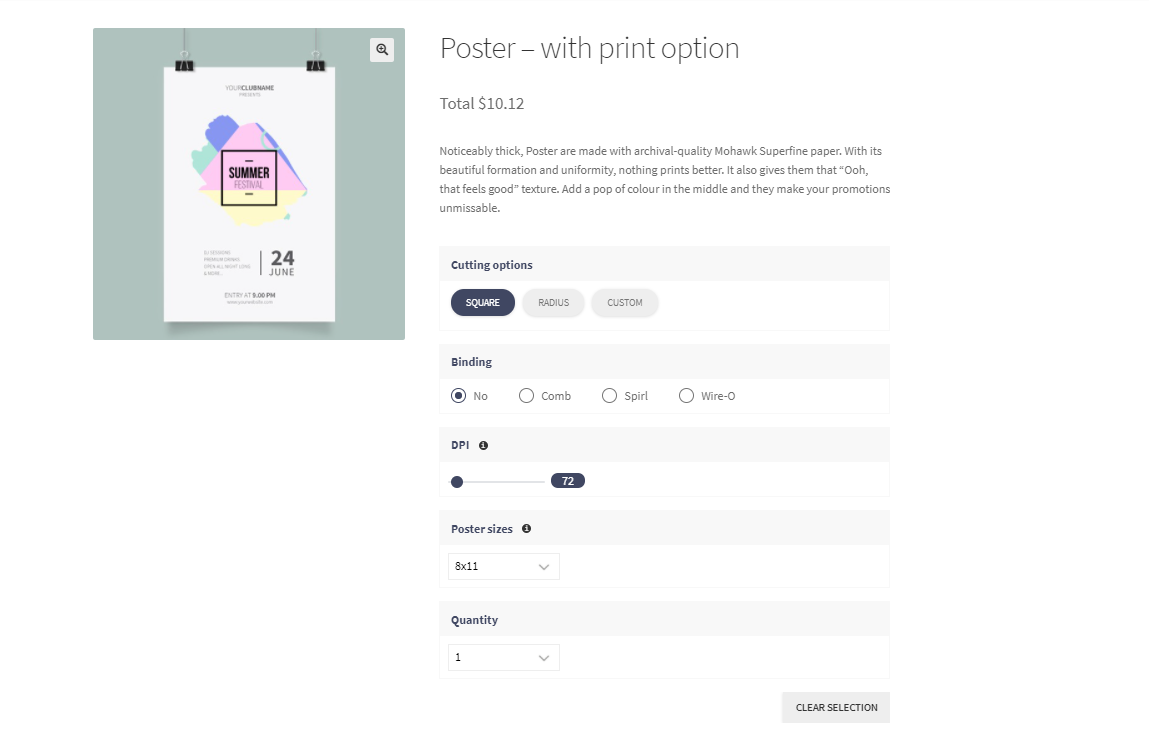
DPI means dots per inch: how many printed dots fit along one inch (2.54 cm). More dots give a sharper print, but only if the image really has enough pixels. Cmsmart Product Designer lets you set the DPI you print at and the minimum DPI customers may upload, so the 100 DPI vs 300 DPI gap is decided before the order, not after.
A low-resolution image cannot be rescued by a better printer: the pixels are simply enlarged and edges look soft or jagged. The usual rule of thumb, confirmed by PrintNinja's file-setup guidelines (updated June 2026), which trace the 300 DPI figure to the 150 lines-per-inch halftone screen ruling set out in ISO 12647-2:2013:
100 DPI vs 300 DPI: at the same printed size, a 300 DPI image carries three times as many pixels across each inch, so edges and small text stay crisp; at 100 DPI the same image looks soft on a card or flyer. 200 DPI vs 300 DPI: 200 DPI can pass for large formats seen from a distance; for close-up print, ask for 300. These are general guidelines, not Cmsmart limits; check your printer's spec and colour requirements (see the International Color Consortium for colour profiles).
What do low-resolution files cost a print shop?
Low-resolution files cost a print shop three times: staff time to check and chase better files, material and press time for reprints, and refunds or lost repeat customers when a soft print ships. Cmsmart's approach is to move the check to the moment of upload and again before production.
Put your own number on it: orders per month × share with file problems × (cost per reprint or refund + staff minutes per file chase ÷ 60 × hourly cost).
What does a print shop with automatic quality checks look like?
In a print shop with automatic checks, the customer sees a low-resolution warning while designing, AI Preflight scans the order file for resolution, colour mode, bleed, fonts and transparency, and your team approves only files that pass or that they consciously accept. Cmsmart Product Designer 2.17.0 provides each of these steps.
Example scenario
A customer drags their logo onto a flyer at midnight. A notice tells them the image is too small for a sharp print, so they upload the original file from their designer instead. When the order arrives, AI Preflight runs automatically and flags a missing bleed; your operator applies the auto-fix, re-runs the check and approves. The flyers print once, sharp, and the customer orders again next month.
Want this on your store with your own rules? Talk to an ecommerce expert.
How does Cmsmart stop low-resolution artwork before it prints?
Cmsmart stops bad artwork in three layers: upload rules that block or warn on low DPI in the editor, AI Preflight in Cmsmart Cloud that scans order files and can auto-fix some issues, and a human approval step in Cmsmart › Orders. AI drafts, people decide where it matters.
What is preflight? Preflight is the check a print file goes through before production: resolution, colour mode, bleed, fonts and transparency. Cmsmart's AI Preflight automates it on order files and records the result on the order.
The resolution check is only half the job: once a design clears preflight, the order still needs production-ready files in the right colour space. The Download design tab already covers that today, no custom build required:
Cmsmart insight
Start AI Preflight in manual mode on your highest-value products, read the reports for a few weeks, then switch to automatic. Automatic runs on every new order and spends tokens each time, so set Pause automatic runs below as a brake on your balance.
What is the business value of preflight and DPI rules?
Preflight and DPI rules pay back by preventing reprints and refunds, cutting manual file checks and shortening the time orders sit on hold. Cmsmart Product Designer's own Files screen shows the low-DPI files it caught before they reached production, so you can see what the checks are doing.
ROI worksheet. Monthly saving = reprints avoided × cost per reprint + refunds avoided × average refund + file checks avoided × minutes per check ÷ 60 × hourly cost. Subtract the AI Preflight token spend for the same month to get the net figure.
How do I set up DPI rules and AI Preflight in Cmsmart Product Designer?
Set up the output DPI globally and per product, add a minimum upload DPI with a low-resolution warning, then turn on AI Preflight in Cmsmart Cloud with a required DPI and run mode. These Cmsmart Product Designer 2.17.0 settings take about one working session to configure.
PDF uploads. Since 2.15.1 an uploaded PDF is placed at its real physical size and previewed at up to 300 DPI, and the AI "low-resolution, upscale it" suggestion no longer fires on a PDF layer, so a vector PDF is never replaced by an upscaled copy. Related guides: WooCommerce product customizer and NBDesigner back-end settings.
Going further: what can Cmsmart custom-build for stricter quality control?
When standard rules are not enough, Cmsmart builds product-specific preflight profiles, checkout gates, customer re-upload flows and MIS hold rules on top of AI Preflight. Each is delivered as a custom project with discovery, solution design, sprints, QA, launch and support.
How we deliver: see the ecommerce project delivery model and AI for ecommerce at Cmsmart.
Plan DPI rules and AI preflight for my shop
Why Cmsmart for DPI rules and print quality?
Cmsmart develops the Cmsmart Product Designer and its AI Preflight, and has built ecommerce and web-to-print stores since 2012 as a division of Netbase JSC, so quality rules are set by the team that builds the editor and the checks.
Our records count 6,300+ client projects and 500+ custom development projects in 80+ countries (WorkSuite project records, Sep 2026), and Cmsmart is rated 4.2 on Trustpilot (404 reviews). As one client put it in a Trustpilot review: "It is wonderful to see their commitment to continuous development, with new features being added frequently to keep the software current and highly capable." Related work: Online ordering for print and design services and Personalized invitations and business cards.
Frequently asked questions
100 DPI vs 300 DPI: which should I use for print?
300 DPI for most close-up print such as cards, flyers and photos. 100 DPI looks soft once it is held in the hand. The plugin default output is 150 DPI, so raise it if your products are viewed up close.
Is 100 DPI enough for printing?
Rarely. 100 DPI looks soft on anything held in the hand; it can work only for very large formats seen from a distance.
What does AI Preflight check?
Resolution and DPI, colour mode, bleed, fonts and transparency on order files, against the Required DPI you set (300 recommended). Each scan uses Cmsmart Cloud tokens.
Can AI fix a bad file automatically?
AI auto-fix is available per issue and currently supports adding missing bleed to the order PDF; you re-run preflight to confirm. Low-resolution images still need a better source file or AI Image Upscale.
Will the plugin upscale an image without asking?
No. It can suggest AI upscaling for a small raster image, never does it silently, and skips PDF layers.
Where does the customer see the warning?
In the designer, as a notice, when an image is below the minimum resolution you configured.
Stop paying for reprints of low-resolution artwork
Tell us your products and quality rules. Cmsmart sets up DPI rules and AI Preflight, and builds the checks your print floor needs, so files are right before they print.
Plan DPI rules and AI preflight for my shop See product designer customization at Cmsmart
Update log: October 2026, rewritten with today's NBDesigner 2.17.0 captures (buyer, admin and settings flows) and a sourced DPI standard; primary keyword refocused to 100 DPI vs 300 DPI; CTA aligned to product designer customization.
Written by
Cmsmart Web-to-Print Solutions Consultant
Plans online print storefronts: product setup, pricing rules, proofing and print-ready files.
Reviewed by David, Founder & CEO
More from this expert →