

Guide · Web-to-print
Cmsmart Stores Setup Wizard: What's New, October 2026
The Cmsmart Stores Setup wizard installs niche, B2B and Marketplace stores with sample data live in minutes. See what changed and try it free.
An icon library for custom labels and stickers turns a recurring design bottleneck into a two-click pick for the buyer. Instead of your team hunting for the right recycling symbol or allergen icon in Illustrator every time a label variant ships, Cmsmart Product Designer puts a searchable icon library directly on the WooCommerce product page, so label shops, cosmetics brands and craft sellers can standardize every SKU without opening a design tool themselves.
Was this tutorial helpful?
Written by
Cmsmart Product Designer Plugin Engineer
Builds and supports the Cmsmart Product Designer (NBDesigner) for WooCommerce.
The team behind it
 Account Manager
 Project Manager
 Business Analyst
 Developers & QA
Guide · Web-to-print
The Cmsmart Stores Setup wizard installs niche, B2B and Marketplace stores with sample data live in minutes. See what changed and try it free.
Guide · Web-to-print
The NBDesigner plugin now gives stationery shoppers a curated background library so print-ready PDFs always match the preview. See how to set it up.
Guide · Web-to-print
See how t-shirt artwork approval and print-ready PDFs cut POD reprints on WooCommerce; get a free workflow review from Cmsmart today.
Browse more guides, tutorials and case studies from the Cmsmart community.
Run a custom tote bag printing business with Cmsmart Product Designer: live pricing, real print specs and a print-ready PDF. See how to set it up.
Read MoreBuild a car wrap ecommerce store on WooCommerce: panel pricing, approval and print-ready PDFs before you print. Plan your wrap store today.
Read MoreDiscover how the home décor industry is transforming with the rise of personalized products and the challenges retailers face. Learn how CMSmart's Product Builder offers a solution, improving customer engagement, reducing return rates, and increasing sales through real-time 3D previews and automated processes.
Read More
Cmsmart Ecommerce provides custom ecommerce and WooCommerce development services for web-to-print, product personalization, plugin support and API integration.
Cmsmart Product Designer Plugin Engineer
Builds and supports the Cmsmart Product Designer (NBDesigner) for WooCommerce.
Meet the team →



In short
Why do manual clipart fixes slow down your label and sticker orders?
Cmsmart Product Designer removes the manual back-and-forth of sourcing icons for every label order: buyers search and place icons themselves, on-brand and print-ready, while your team stays out of Illustrator for routine requests.
Most small print shops and label brands run into the same handful of pains once orders move online:
Cmsmart insight: in label and packaging projects, most of the back-and-forth we see isn't about the main artwork — it's a missing or wrong compliance icon (recycling code, allergen mark, care symbol) discovered after the buyer has already checked out. Giving buyers a library to pick the icon themselves, scoped to the categories you approve, removes that email loop entirely.
What would a self-serve icon library look like for your print shop?
Picture a label buyer finishing their own design end to end: Cmsmart Product Designer lets them search, drop and resize an approved icon in seconds, so the order reaches your queue already correct instead of waiting on a proof email.
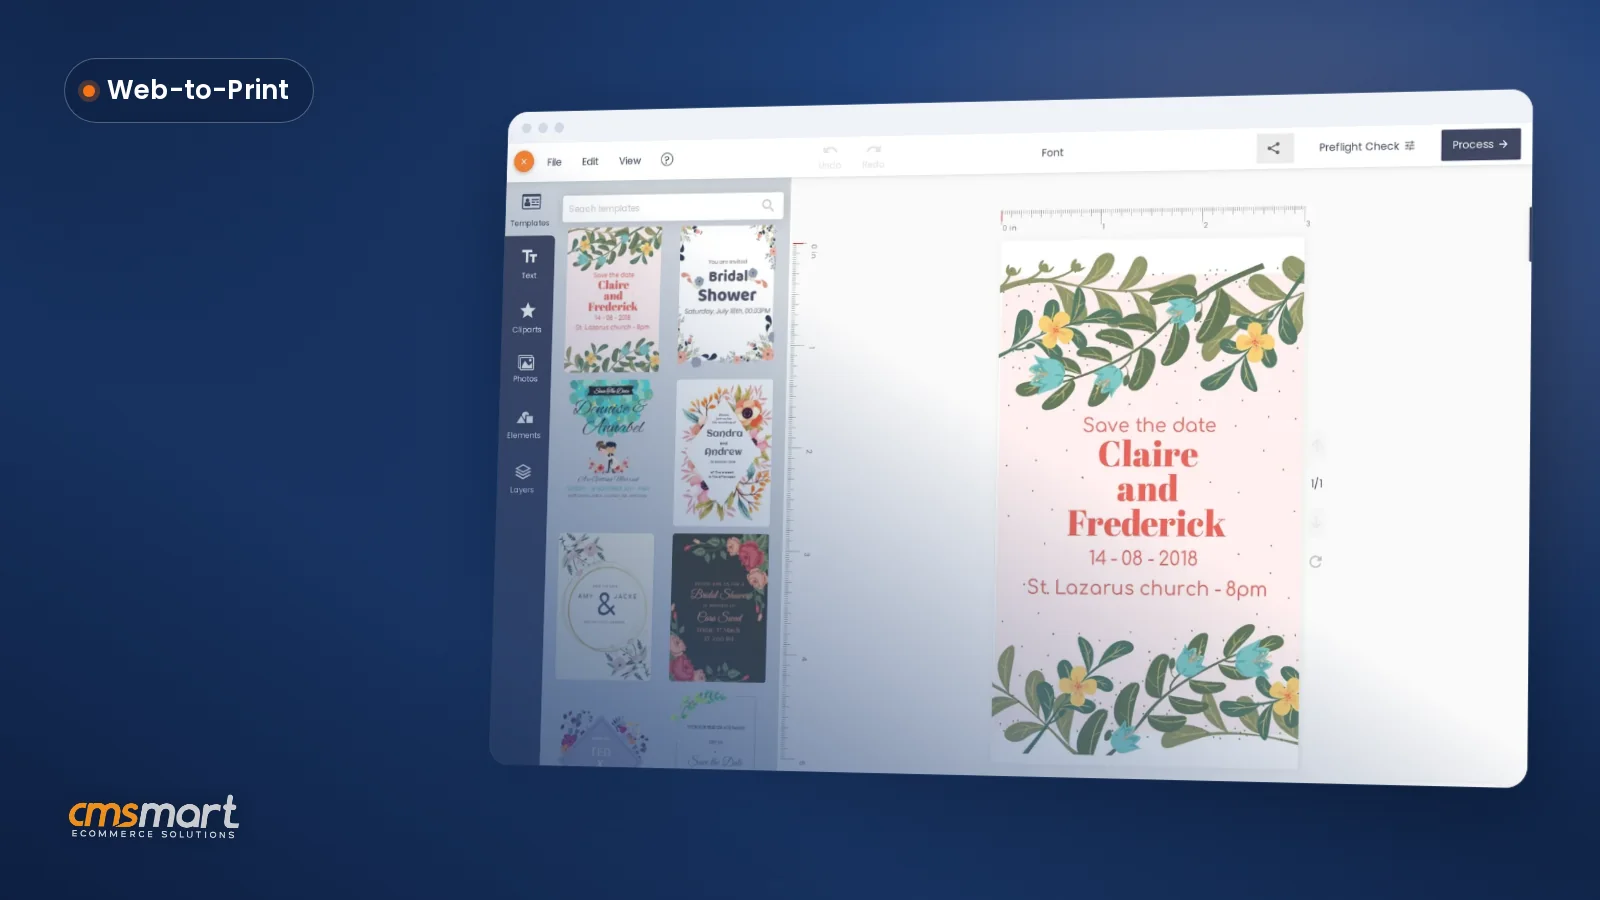
Example scenario. A buyer opens a jar-label product on a food brand's store, uploads their logo, then switches to the Cliparts tab and searches "recycling" to drop in the right symbol, followed by an allergen icon from the same panel. They preview the finished design, add to cart and check out. No email, no proof round-trip — the design that reaches production already carries the icons the shop requires, in the categories the shop chose to show.
That self-serve moment only works if the icon set on offer is the right one for the product — which is exactly what the per-product Clipart settings and category restrictions in the next section control.
How does Cmsmart's icon library for custom labels fit into the online designer?
Cmsmart's icon library for custom labels combines your own uploaded icons with a shared global clipart library, both reachable from the Cliparts tab in the online designer, so every product can show exactly the categories you choose.
The building blocks, as shipped in 2.17.x:
Color accuracy matters as much as the icon itself: a recycling mark or allergen symbol that shifts color on press can be as unreadable as a missing one, which is why print-ready output follows the ICC color profile standard the rest of the print industry uses for proofing and separations.
What's the business value of a built-in icon library?
Cmsmart's icon library turns icon placement from a staff task into a buyer self-service step, which shows up directly in less proofing email, fewer reprints tied to the wrong icon, and faster time from "add to cart" to a production-ready file.
Rough-cut ROI worksheet (use your own numbers): time saved per month ≈ (label and sticker orders that currently need a manual icon fix) × (minutes your team spends finding and placing that icon) − (seconds a buyer spends picking it from the library). Add any reprints avoided × your cost per reprint, and you have a shop-specific case for turning the library on.
How do you set up the icon library for a label or sticker store?
Setting up Cmsmart's icon library takes a short Settings pass plus a per-product check: confirm the plugin and the global library are on, upload your own compliance icon set, then restrict each label product's Clipart settings to the categories it should offer.
For the deeper walkthrough of organizing cliparts, fonts and backgrounds across your whole catalog — not just labels — see our guide on bringing designs alive with cliparts. For product-by-product canvas and pricing setup, see configuring individual product settings in NBDesigner. General WooCommerce product configuration follows the platform's own WooCommerce documentation.
Going further: what can Cmsmart build on top of your icon library?
Beyond the built-in Cliparts tab, Cmsmart builds custom development on top of the icon library for stores with regulatory or multi-market needs — required-icon checks, region-specific icon sets and bulk rollouts across a catalog.
Delivery follows the same path for any of these: discovery, solution design, build in sprints, QA, launch and ongoing support — the same model behind Cmsmart's ecommerce project delivery, and the same team behind the product designer customization service.
Get a custom icon-library quote
Why work with Cmsmart on your label and sticker store?
Cmsmart has built WooCommerce product customization since 2012, backs the icon library and the rest of Cmsmart Product Designer with ongoing support, and can extend it with custom development when a label business needs more than the standard panel.
Cmsmart is a Netbase JSC division running web-to-print and product customization projects since 2012, with 6,300+ client projects delivered and a Trustpilot rating of 4.2 from 404 reviews. Buyers running sticker and label storefronts on Cmsmart's own Product Designer (NBDesigner) plugin have said as much directly:
"I bought the WP Printstore to make a webshop where customers can design their own stickers/decals. The support team from CMSMART is very adequate, responds quickly." — Fritz, verified Trustpilot review
Frequently asked questions
Does the icon library replace my own clipart uploads?
No — it adds to them. Your own uploaded icons and the shared global library both show in the same Cliparts tab, organized by category, and you choose per product how much of the global library (if any) is visible.
Can I stop customers from using icons outside my compliance set?
Yes, for the categories you control. Restrict a product's Clipart settings to only the categories you approve, such as your allergen and recycling icon set, instead of leaving the whole library open.
Do the icons print at the resolution a buyer sees on screen?
The print-ready PDF is rendered from the same design data the buyer placed, using the bleed, color profile and size settings configured in Settings → Output, so the icon prints at the size and position it was placed at.
What if my own icon library is empty when I start?
The Cliparts panel nudges you to add a Flaticon API key in Settings so you can pull in a licensed icon pack instead of uploading one compliance icon at a time.
Does Cmsmart check that a required icon, like an allergen mark, is actually on the design?
Not in the core plugin — the built-in library lets a buyer choose an icon but does not enforce which one. That rule-based check (is a required allergen or recycling icon present before checkout) is something Cmsmart builds as custom development for food, cosmetics and other regulated label businesses.
Where do the allergen and recycling icon rules themselves come from?
From your regulator, not from the plugin. Which allergens need a warning mark and which recycling symbol applies to your packaging are legal questions for your market — for recycling, the EPA's recycling guidance covers the familiar chasing-arrows symbol. The icon library just makes the approved marks easy to place once you know which ones you need.